Setting-up
a Top Rope Using Natural Anchors and Fixed Anchors
Introduction
This is not a substitute for learning this hands-on with an experienced instructor. There are other acceptable equally safe methods to set-up a top rope. There is other equipment that can be used (webbing) and many other knots that can be employed (bowline, big honking knot, etc.). The method presented here uses the KISS (Keep It Simple Stupid) principle. It requires the minimum knowledge of two common climbing knots: the retreaded figure-eight and the figure-eight-on-a-bight. It relies on natural anchors (trees, rocks) rather than placing climbing protection (nuts, cams, etc.).

Minimal equipment needed:
100 feet 7/16” (11mm) static rope
Dynamic climbing rope
3 locking carabiners
Climbing harness, belay device
Setting Up on Natural Anchors
When looking for anchor points at the top of the climbing route, you will need to find at least two strong natural features (large trees or solid boulders) back from the route you wish to set up.
(This step is IMPORTANT so you do not fall off the cliff while setting up the top-rope.)
Tie your dynamic (climbing) rope around a large tree or boulder using a retreaded figure-eight or carabiner lasso (see below). You will need to estimate how much rope you will need to get you to the edge of the cliff. At that point in the dynamic rope tie it to a locking carabiner with a figure-eight-on-a-bight, or a clove hitch if you know how as using a clove hitch is easier as it allows you to adjust the length without untying/retying, or even easier attach a GriGri to the rope. Test it to make sure you can just get to the edge of the cliff.
There are two methods you
can use to secure the static
rope to a tree/rock. One is the retreaded figure-8. You tie
this around the tree just as you would if you were tying in to your
harness except for the wraps around the tree.

Anchored
tree
using retreaded figure-8

Anchored tree using tension-less hitch
If using two figure-8s-on-a-bight as your master point:
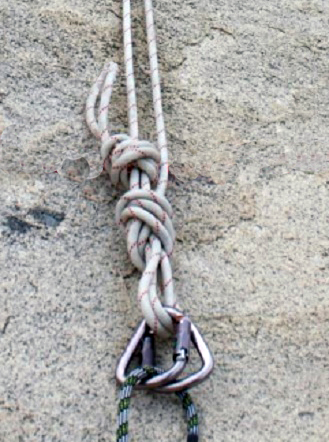
Tie your static rope to one of the trees with a figure-8-on-a-bight as shown above. Take the static rope to the edge of the cliff above the route you are setting up. Tie a two figure-eight-on-a-bight knots so that the anchor point is just over the edge. (See below.) Attach the two locking biners opposed (as below). Take the unsecured side of the static rope and go back to another tree and tie off the rope with a tension-less hitch (above) so that the anchor legs are equalized.
If you are using a BHK knot as your master point:
Tie
your static rope to one of the trees you are using with a
figure-8-on-a-bight (above). Go to the other tree you are
using
and do the same thing. Take the loop of rope to the edge of
the
cliff and tiie a BHK so your anchor point just hangs over the edge.
Take any loop of
rope that is left over and either clip it in to the anchor, if it is
short, or tie it back to one leg of the anchor if it is long (below).
 |
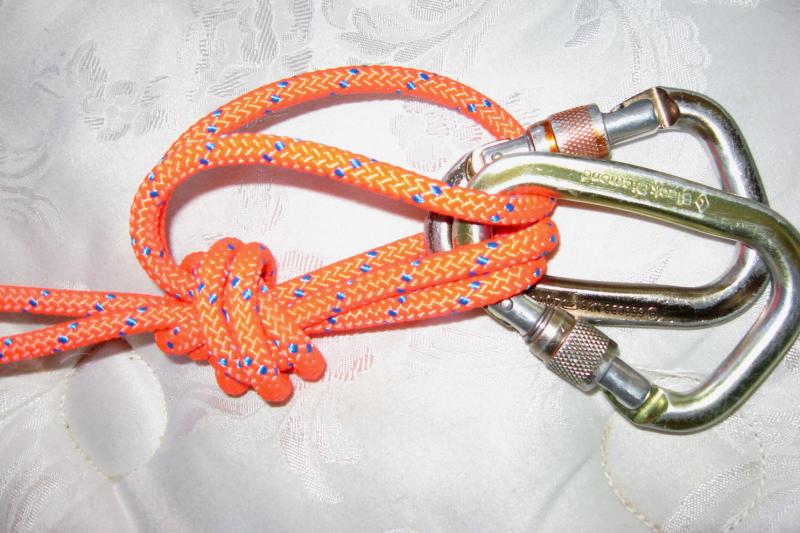 Examples of a Big Honking Knots (BHK) |
|
Attach two locking carabiners so that
the gates
are
opposed. An easy way to tell is if the gates form an “X” as
shown
below. You want the screw gates to be facing down so that when the
biners jiggle around they tighten up instead of loosening up.
"Screws down so you don't screw up."

Opposing gates form an “X”

Redundant top-rope set-up
The knots should be positioned so that they hang over the edge of the cliff and the climbing rope runs freely through the carabiners. If the cliff edge is sharp the static rope should be protected by placing something (e.g. pack, rope bag, etc. under the rope as shown below.

Protecting anchor rope over sharp edge
A good idea is to use lengths of tubular webbing or split garden hose on your static rope as a sheath that can be adjusted to protect the rope as shown below.

Properly equalized top-rope with webbing sheath
Walk back away from the edge of the cliff and untie from the dynamic rope. Clip into the static rope between the anchor and the “rabbit ears” knots with a locking carabiner so that you are connected between the tree and the knots.
Untie the dynamic rope from the tree. Find its center point. Clip it to the two locking carabiners. Lock the carabiners. Position the carabiners so that the screw gate is down. (“Screw down so you don’t screw up.”) With the gates down gravity will tighten the screw gates with movement instead of loosen them.
Approach the edge look over to where you will toss the rope. Yell “rope” and after waiting a reasonable amount of time for a response toss the dynamic rope over the edge. Look down to make sure both ends reach the ground.
Walk away from the cliff edge and unclip from the static rope. Take the loose end of the static rope and go back to another anchor (e.g. tree) and wrap it around the tree until it is tense and equalized. You want to minimize the distance between the two anchors as much as possible so that the “V” angle the rope forms is small rather than large. A 60 degree “V” is the maximum angle. Tie it off using one of the methods above.
Walk down to the bottom of the cliff. Weight the top-rope set-up by hanging on the climbing rope. Make sure the climbing rope is feeding smoothly through the carabineers and is not rubbing on the cliff edge.

Climbing rope running freely through carabiners
Build an anchor for the belayer with a sling, webbing, cordellete, or climbing rope. It should be in a place where the belayer can see the climber throughout the climb. The anchor should be short enough so that the belayer is not lifted off the ground or slammed into the cliff by a climber during a fall or lower.

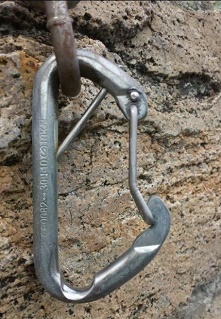
Setting-up Off Fixed Anchors
When
setting up a top-rope on a
clifftop to fixed bolted anchors that are over the edge of the cliff,
always
secure yourself if you’re within 6 feet of the edge or anywhere there
is loose
gravel/stones underfoot, the rock is wet, or other factors. There
are various ways to secure
yourself. One method that uses a minimum of gear is to use your
climbing rope,
like this:
- Tie
one end of your climbing rope to this anchor.
- Using
your 6mm loop of accessory cord, tie a friction knot (prusik,
klemheist, etc.) onto the fixed line, and clip the friction knot to
your belay loop with a locking carabiner. Better yet easier, and more
secure, use a GriGri if you have one.
- Walk
to about 6 feet from the cliff edge, sliding the friction knot/Grigri
along the rope as you walk. Then, pull up about 6 feet of slack rope,
tie a figure eight on a bight, and clip this with a locking carabiner
to your belay loop. The friction knot allows you to walk out
to an exposed area under a self-belay. The figure eight back up is
there in case the friction knot/Grigri fails in any way. With
this simple rig, you can work at the edge of a cliff fully protected
from falling.
 |
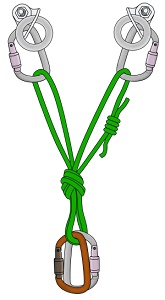 |
|
6. While still tied-in, look below to make sure there aren’t climbers at the bottom or someone climbing the route. If you can’t see the bottom, yell “Rope, rope, rope on (name of climb)” and wait a few seconds, listening in case someone is there. Climbers will likely yell “clear” if it is safe to lower/throw the rope. Throw the end of the rope not connected to you to the ground. Then walk away from the cliff edge (still attached to your safety line) to a secure area. Untie yourself from the climbing rope and toss that end to the ground. The rope should be through your anchor and both ends should be on the ground, ready to climb. It is helpful if you have your climbing partner at the bottom of the cliff to confirm that both ends of the rope are on the ground. Walk down and climb.

